Annotation
Annotations may be useful for a variety of applications. If you want to mark up your transcript for review or to make notes for an audio editor.
Podse offers a number of features to help you add annotations for each of your transcripts.
Adding Annotations
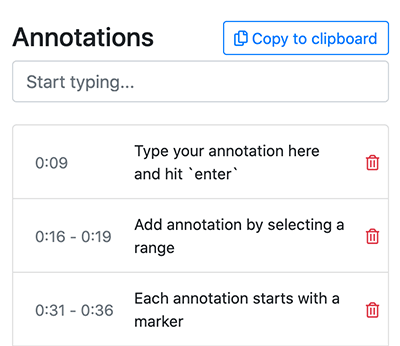
Annotations are a note referencing a timestamp or range within a transcript. You can add any number of annotations for a single transcript.
In the annotations box, simply type your annotation and hit enter to have it saved.

When the annotation is saved, it will appear in a list below the input field.
Timestamps
Each annotation is attached to a timestamp or range. When you are playing your audio or video file, and add an annotation, it will be for the current timestamp - which is also indicated within the transcript text.
You can select a single word in the transcript to sync the playbeack and transcript to that timestamp. Adding an annotation at this point, will attach it to the timestamp of the selected word.
Annotating Ranges
In addition to annotating a single timestamp within your transcript, you can also select multiple words or entire segments within your transcript and create an annotation for that range.
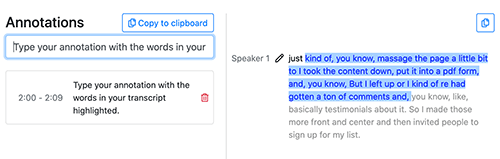
To select a range in the transcript, simply click and drag from any point in the beginning word, to any point in the ending word. Or likewise, select from ending word to beginning.
The range will automatically expand to cover the entire beginning and ending word, even if you selected only part of it.
With a range selected, now type in your annotation and hit enter
to commit it. You will see the annotation created in the list with
a time range instead of a single timestamp. 2:00 - 2:09
This means that the timestamp references the transcript starting at 2 minutes and going to 2 minutes and 9 seconds - it is a 9 second range.
In the transcript, a marker will be placed at the beginning of the range and the entire range will remain highlighted in green.
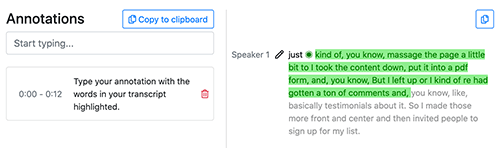
Using Markers
Markers indicate an annotation within the transcript. The marker will appear before the word at that timestamp or at the beginning of the range for a range annotation.
Markers allow you to see at a glance, where in the transcript you have added annotations. Clicking on any one of the annotations will scroll the transcript to that point and sync the audio playback to that timestamp.
Auto Annotations
In some use cases, such as editing a transcript for a podcast or
communicating changes to your audio editor, you may want
ums, long pauses and profanity auto annotated to save
time.
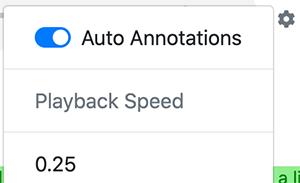
Turning on this option for your transcript may show a list of
automatically generated annotations, highlighting long pauses, the
word um, and profanity. In the future, this may also
include low confidence words to help you correct your transcript
faster.
Auto annotations will show up in the list and will have a marker, just like any other annotation. You can delete individual auto annotations too.
Exporting
You may want to export all of your annotation notes to pass on to an editor or to publish as show notes for your podcast.
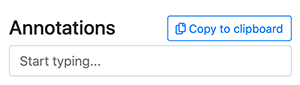
When you have annotations, the Copy to clipboard button will appear above the annotation list. Clicking this button will copy the entire list to your clipboard allowing you to paste it into any other application such as a word document or website editor, etc.
Each annotation in the copied list contains the timestamp or range it references.
[0:09] Please use this as the introduction
[0:16 - 0:19] Add plug here
[0:31 - 0:36] Find the website mentioned here
[1:14] Remove long silence here